Swift Package Manager
Swift Packages are Apple's new first-party tool for software dependencies. Traditionally Capacitor has used CocoaPods for managing dependencies internally and for plugins, however now is the time to move to a supported solution.
Since Capacitor 6, you can choose between using CocoaPods or Swift Package Manager (SPM). Almost all current capacitor-team supported plugins support SPM, namely the plugins in capacitor-plugins.
We've tried our best to make sure you don't have to change much about how you work with Capacitor to use SPM, but there are a few things to understand.
How it works
When a Capacitor project is using SPM we use a 'Base SPM' package that will serve as the place that references all of your projects dependencies:
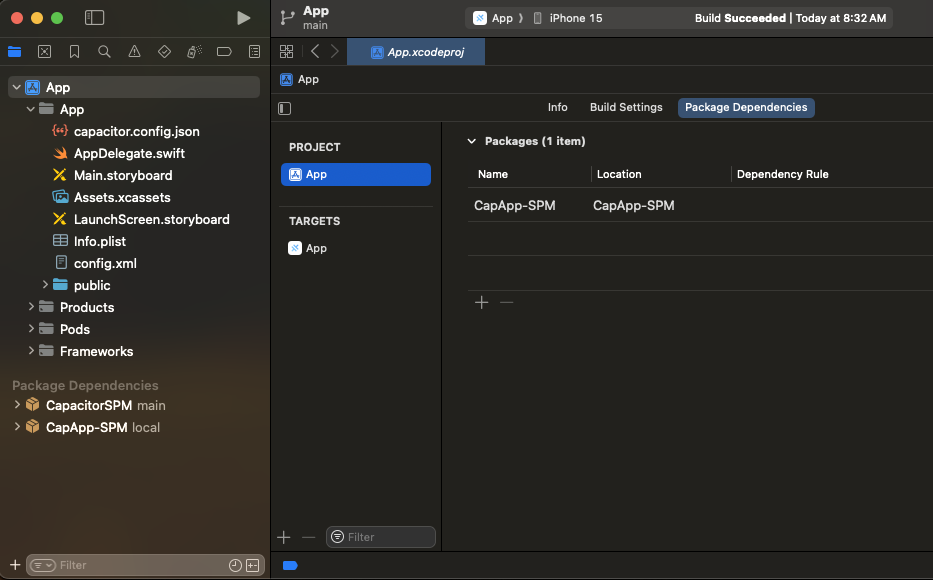
The Capacitor CLI will modify the CapApp-SPM package when you sync new plugins. It is important you do not touch the contents here because the CLI can and will change things.
Using SPM in a new Capacitor project
First we'll start with our normal npm init @capacitor/app@latest:
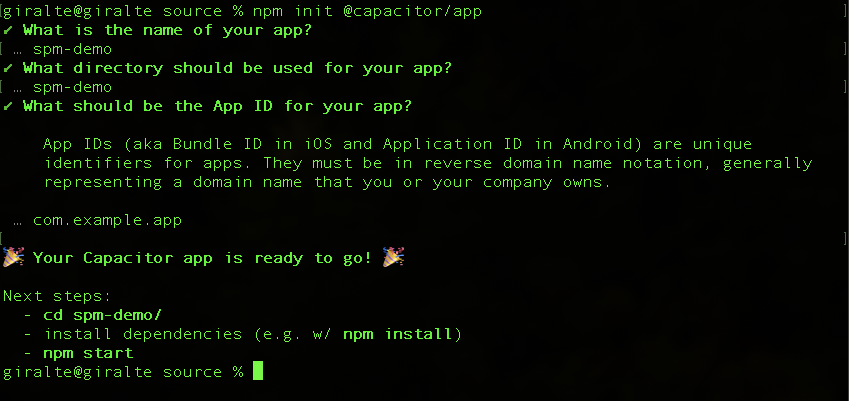
Now we want to add the iOS platform to our project:
npm install @capacitor/ios
Next let's build the web project:
npm run build
After that is complete we can add the iOS project. We need to add the option --packagemanager SPM to the normal add command:
npx cap add ios --packagemanager SPM
Now you can use npx cap open ios to open the iOS project and run your app from there.
Add and use a Capacitor Plugin with SPM
So let's add a plugin to this project and do something with that plugin.
Start with installing the Capacitor App plugin:
npm install @capacitor/app
Then let's sync the web app. This will add the App plugin SPM to the iOS project:
npx cap sync
You can now use the App plugin normally.
Using SPM in an existing Capacitor Project
First, ensure you have a backup of the current state of your project, either in source control or elsewhere.
Deleting your iOS Directory
If you have not manually changed your Xcode Project at all, one option to migrate is to delete the ios directory and then run npx cap add ios --packagemanager SPM. This will remove the CocoaPods template project and replace it with the SPM template project.
Using our migration tool
The Capacitor CLI has a command to help migrate from CocoaPods to Swift Package Manager. However, two manual steps are still required. Some things to note are: Projects with Cordova plugins should work, but some plugins may not work correctly as we have to generate a Package.swift file for them. In addition, projects that use capacitor plugins that do not have SPM versions available, will fail to work properly and will show a warning about the incompatible plugins during migration and when running npx cap sync.
To start, run npx cap spm-migration-assistant in the root of your project.
This tool will:
- Run
pod deintegrateremoving CocoaPods - Delete the
Podfile,App.xcworkspace, andPodfile.lock - Create a
CapApp-SPMdirectory with the needed files - Generate a
Package.swiftfrom your plugins, and warn you if any can't be included. - Add a
debug.xcconfigto your ios project directory
Then run npx cap open ios and you should see something similar to this:
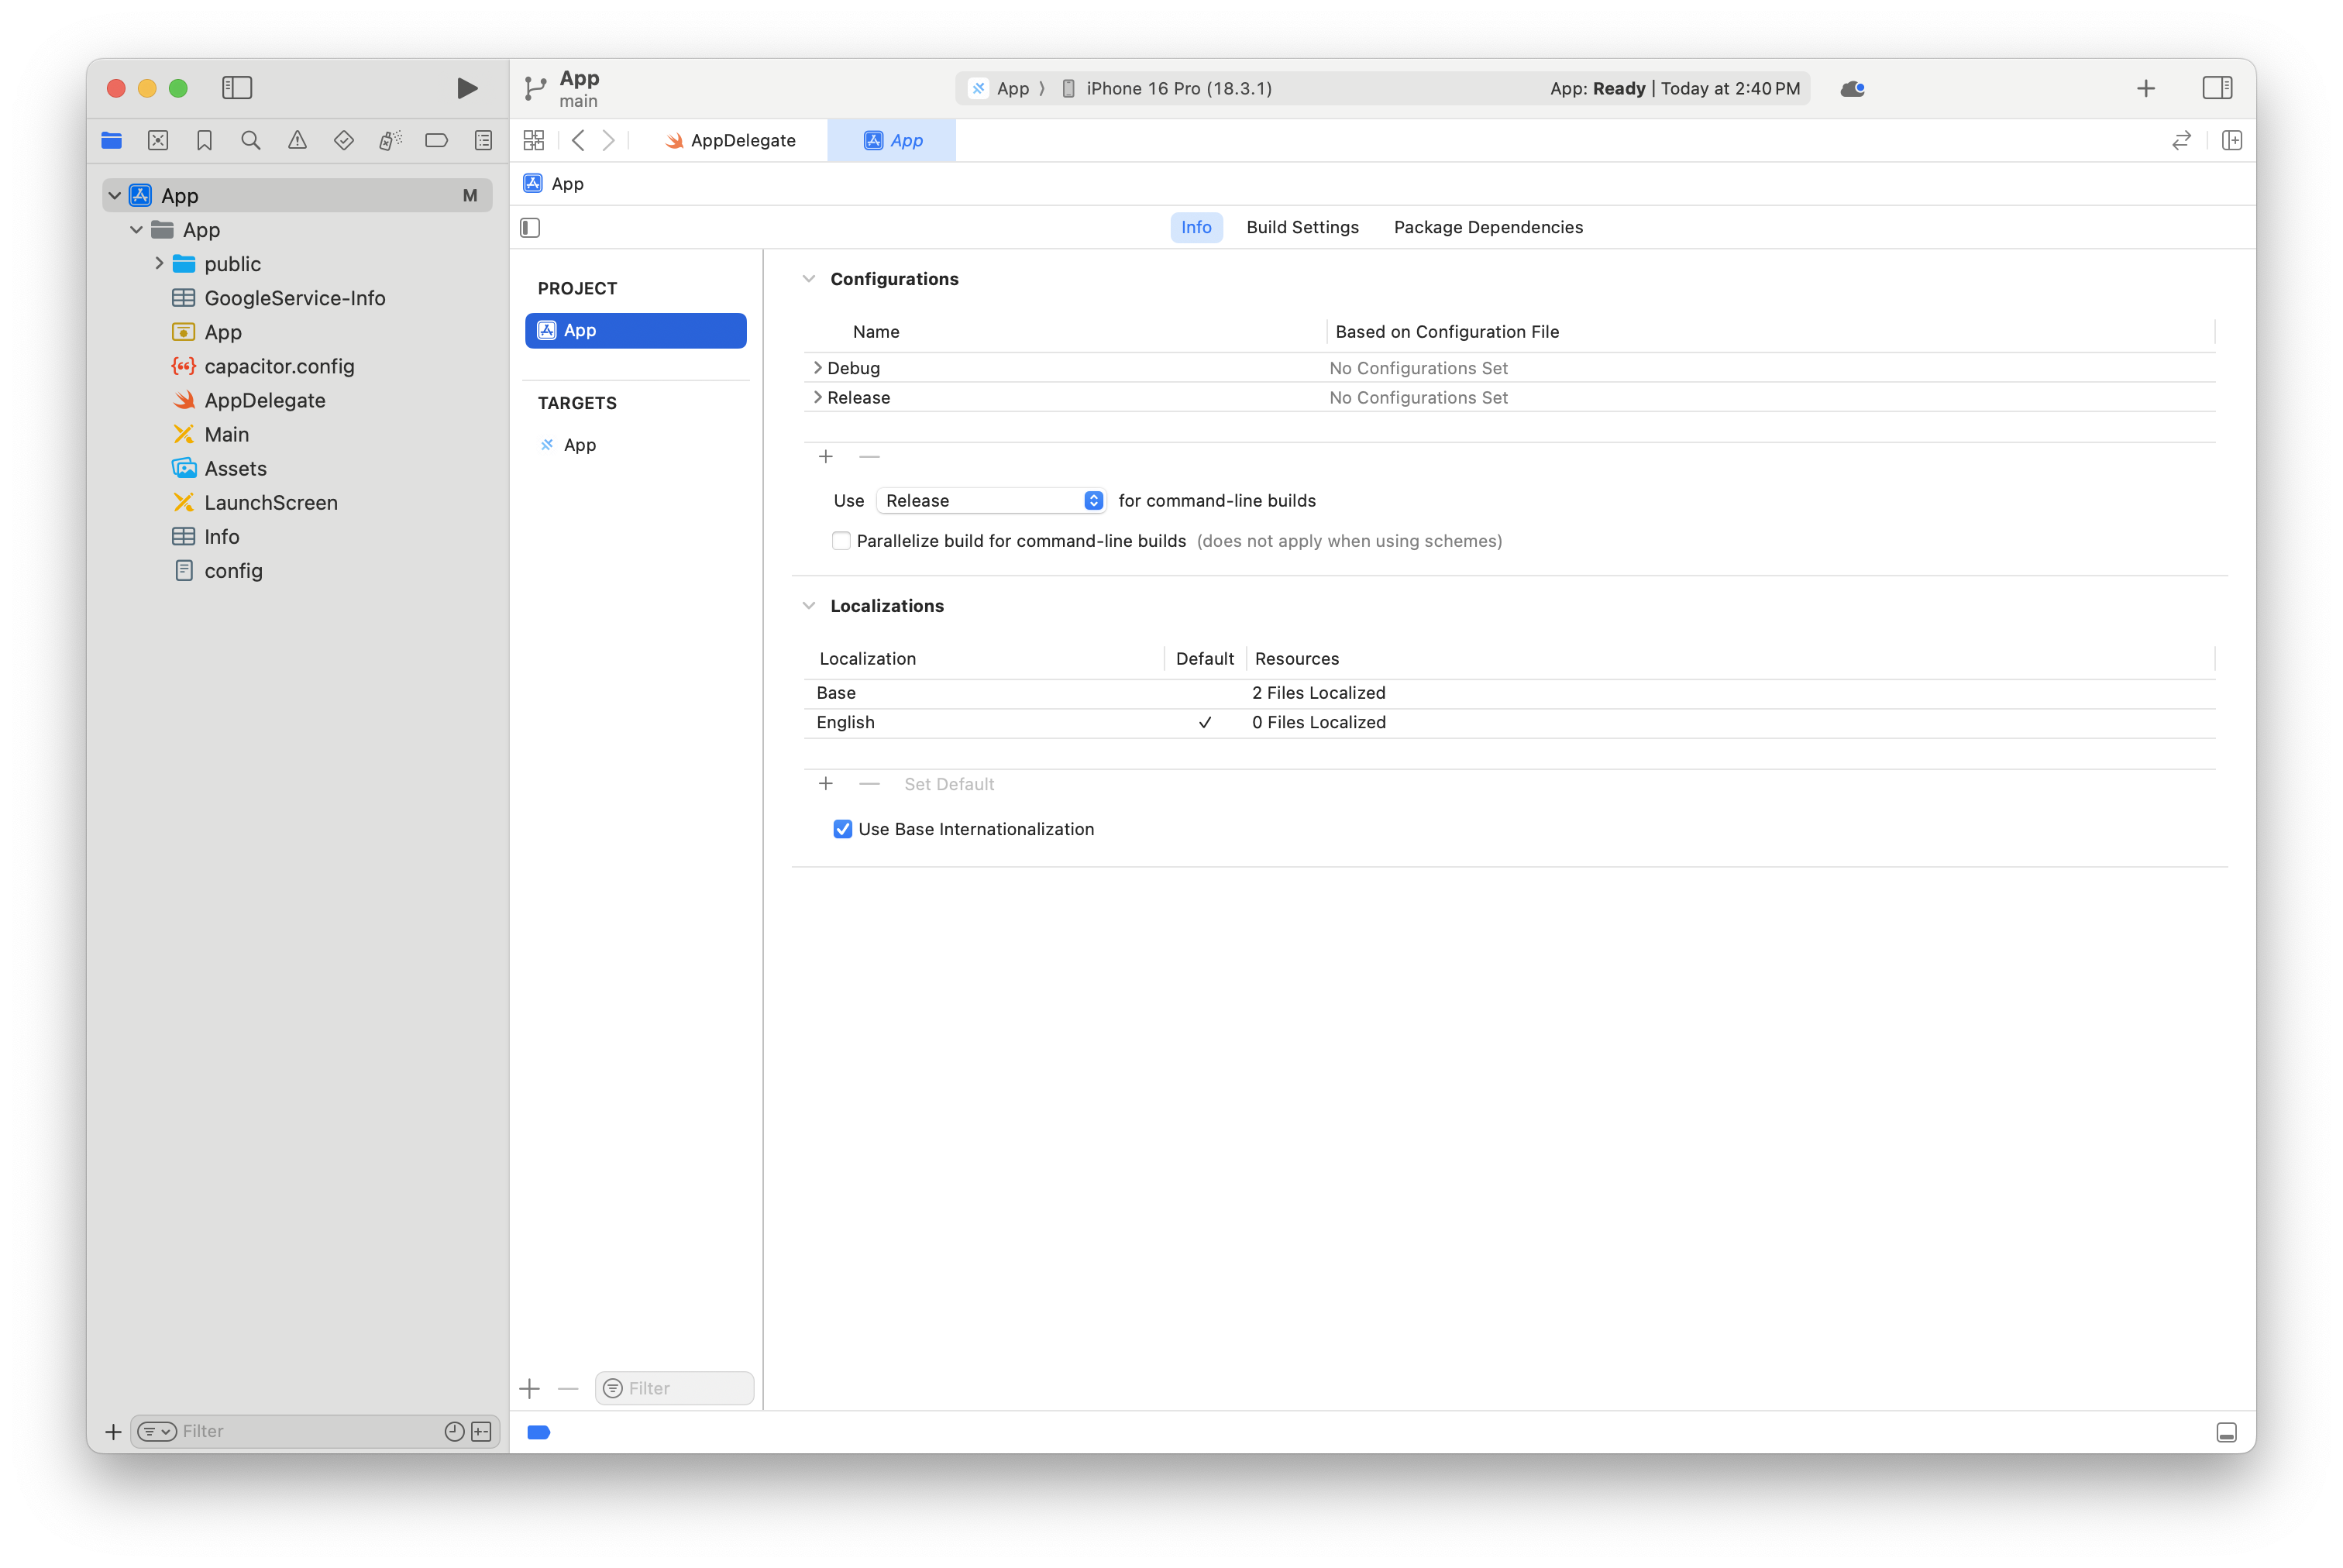
Highlight App, and Select the Package Dependencies tab, and on this page press the + symbol to add a dependency:
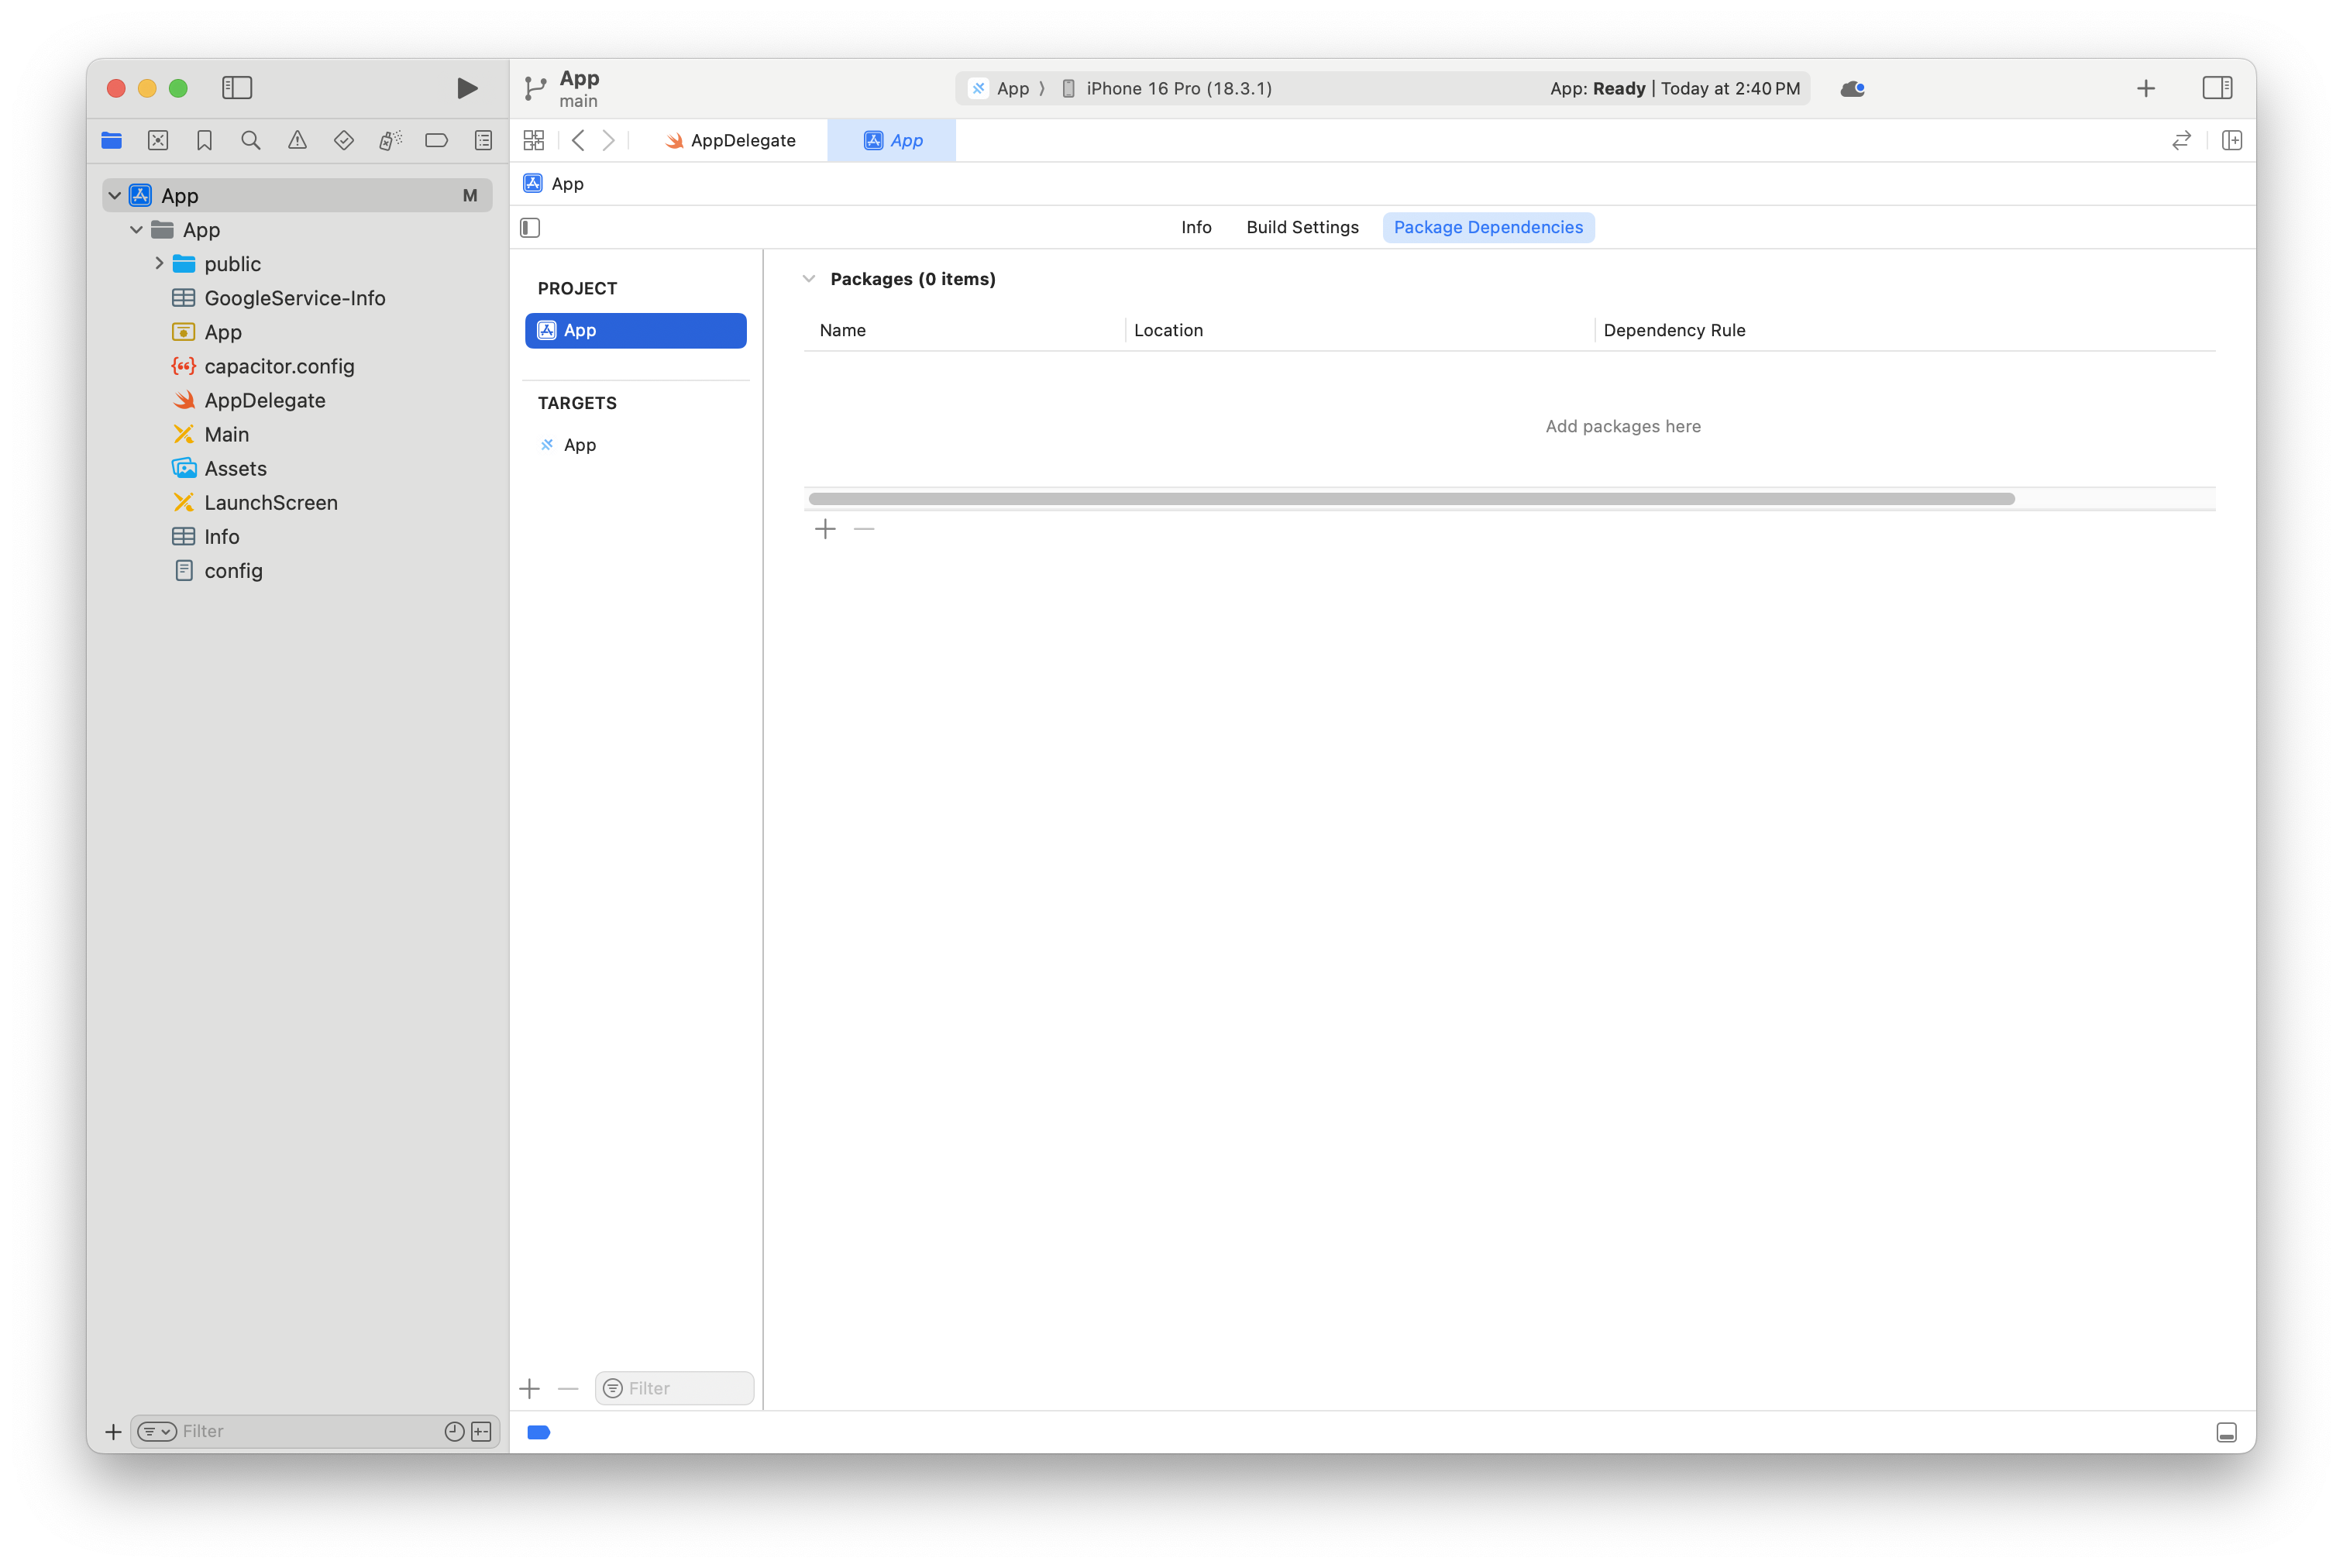
You should see something similar to the below - select Add Local... from the dialog:
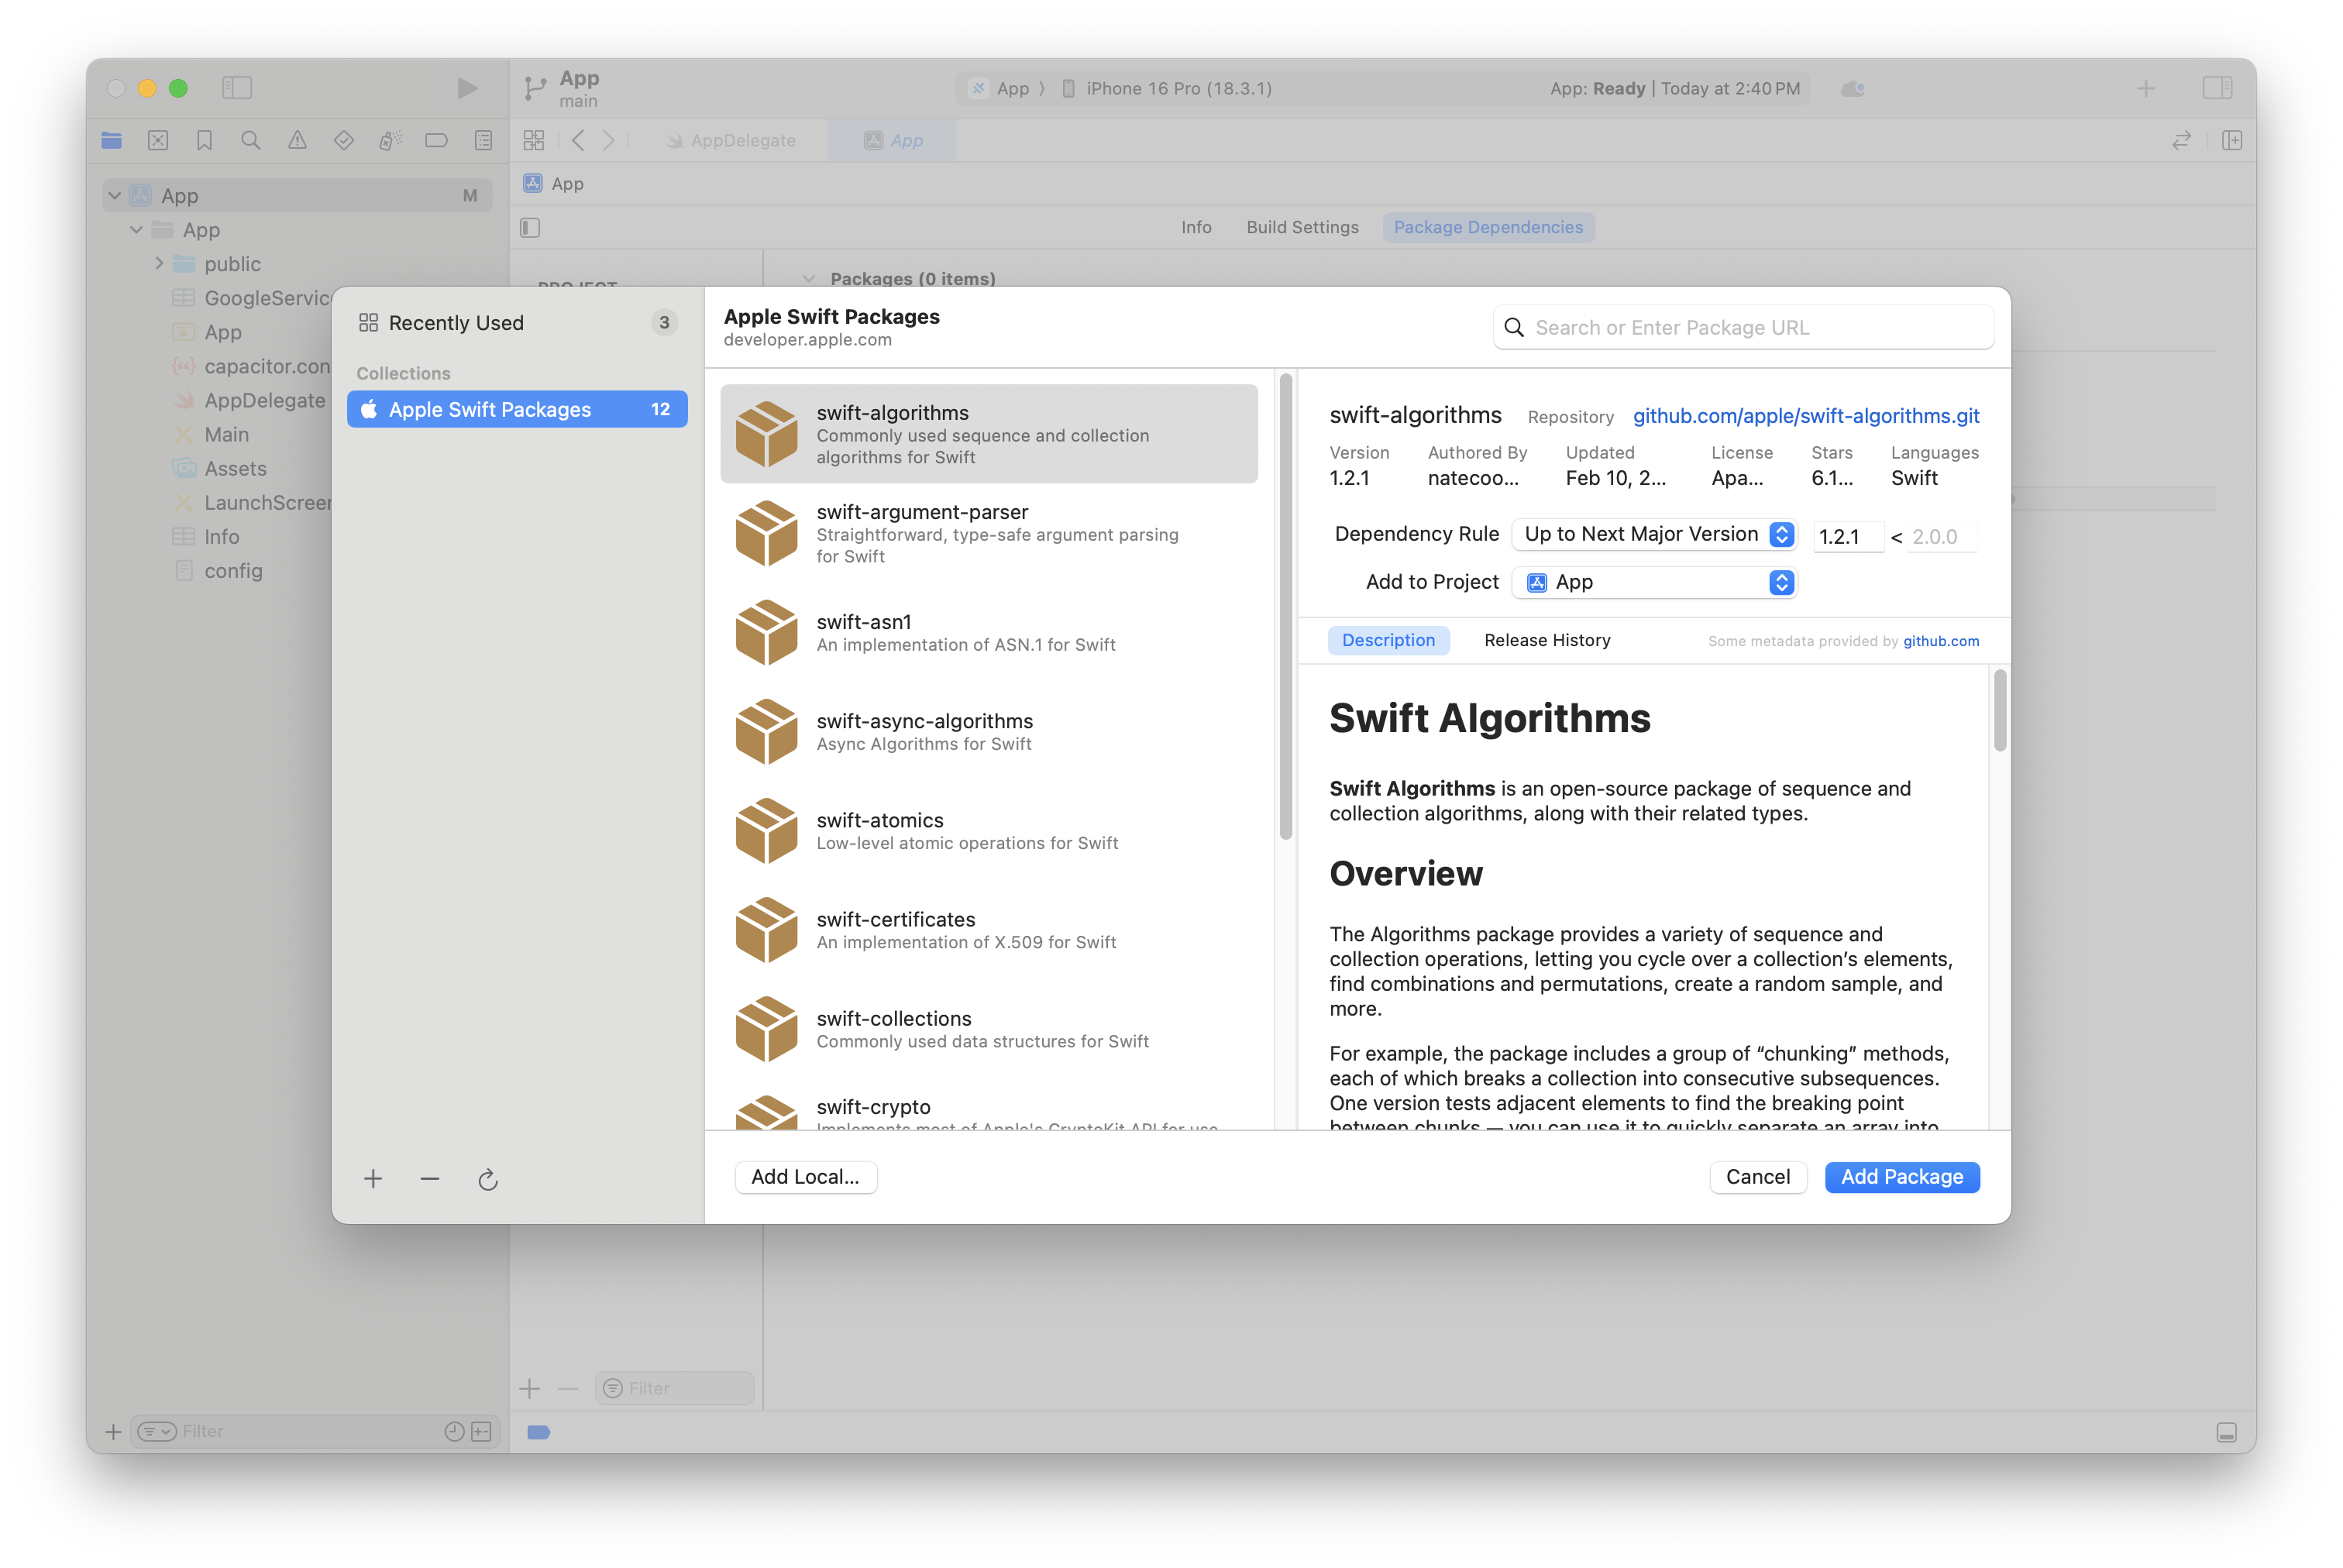
Select CapApp-SPM in this dialog and click Add Package:
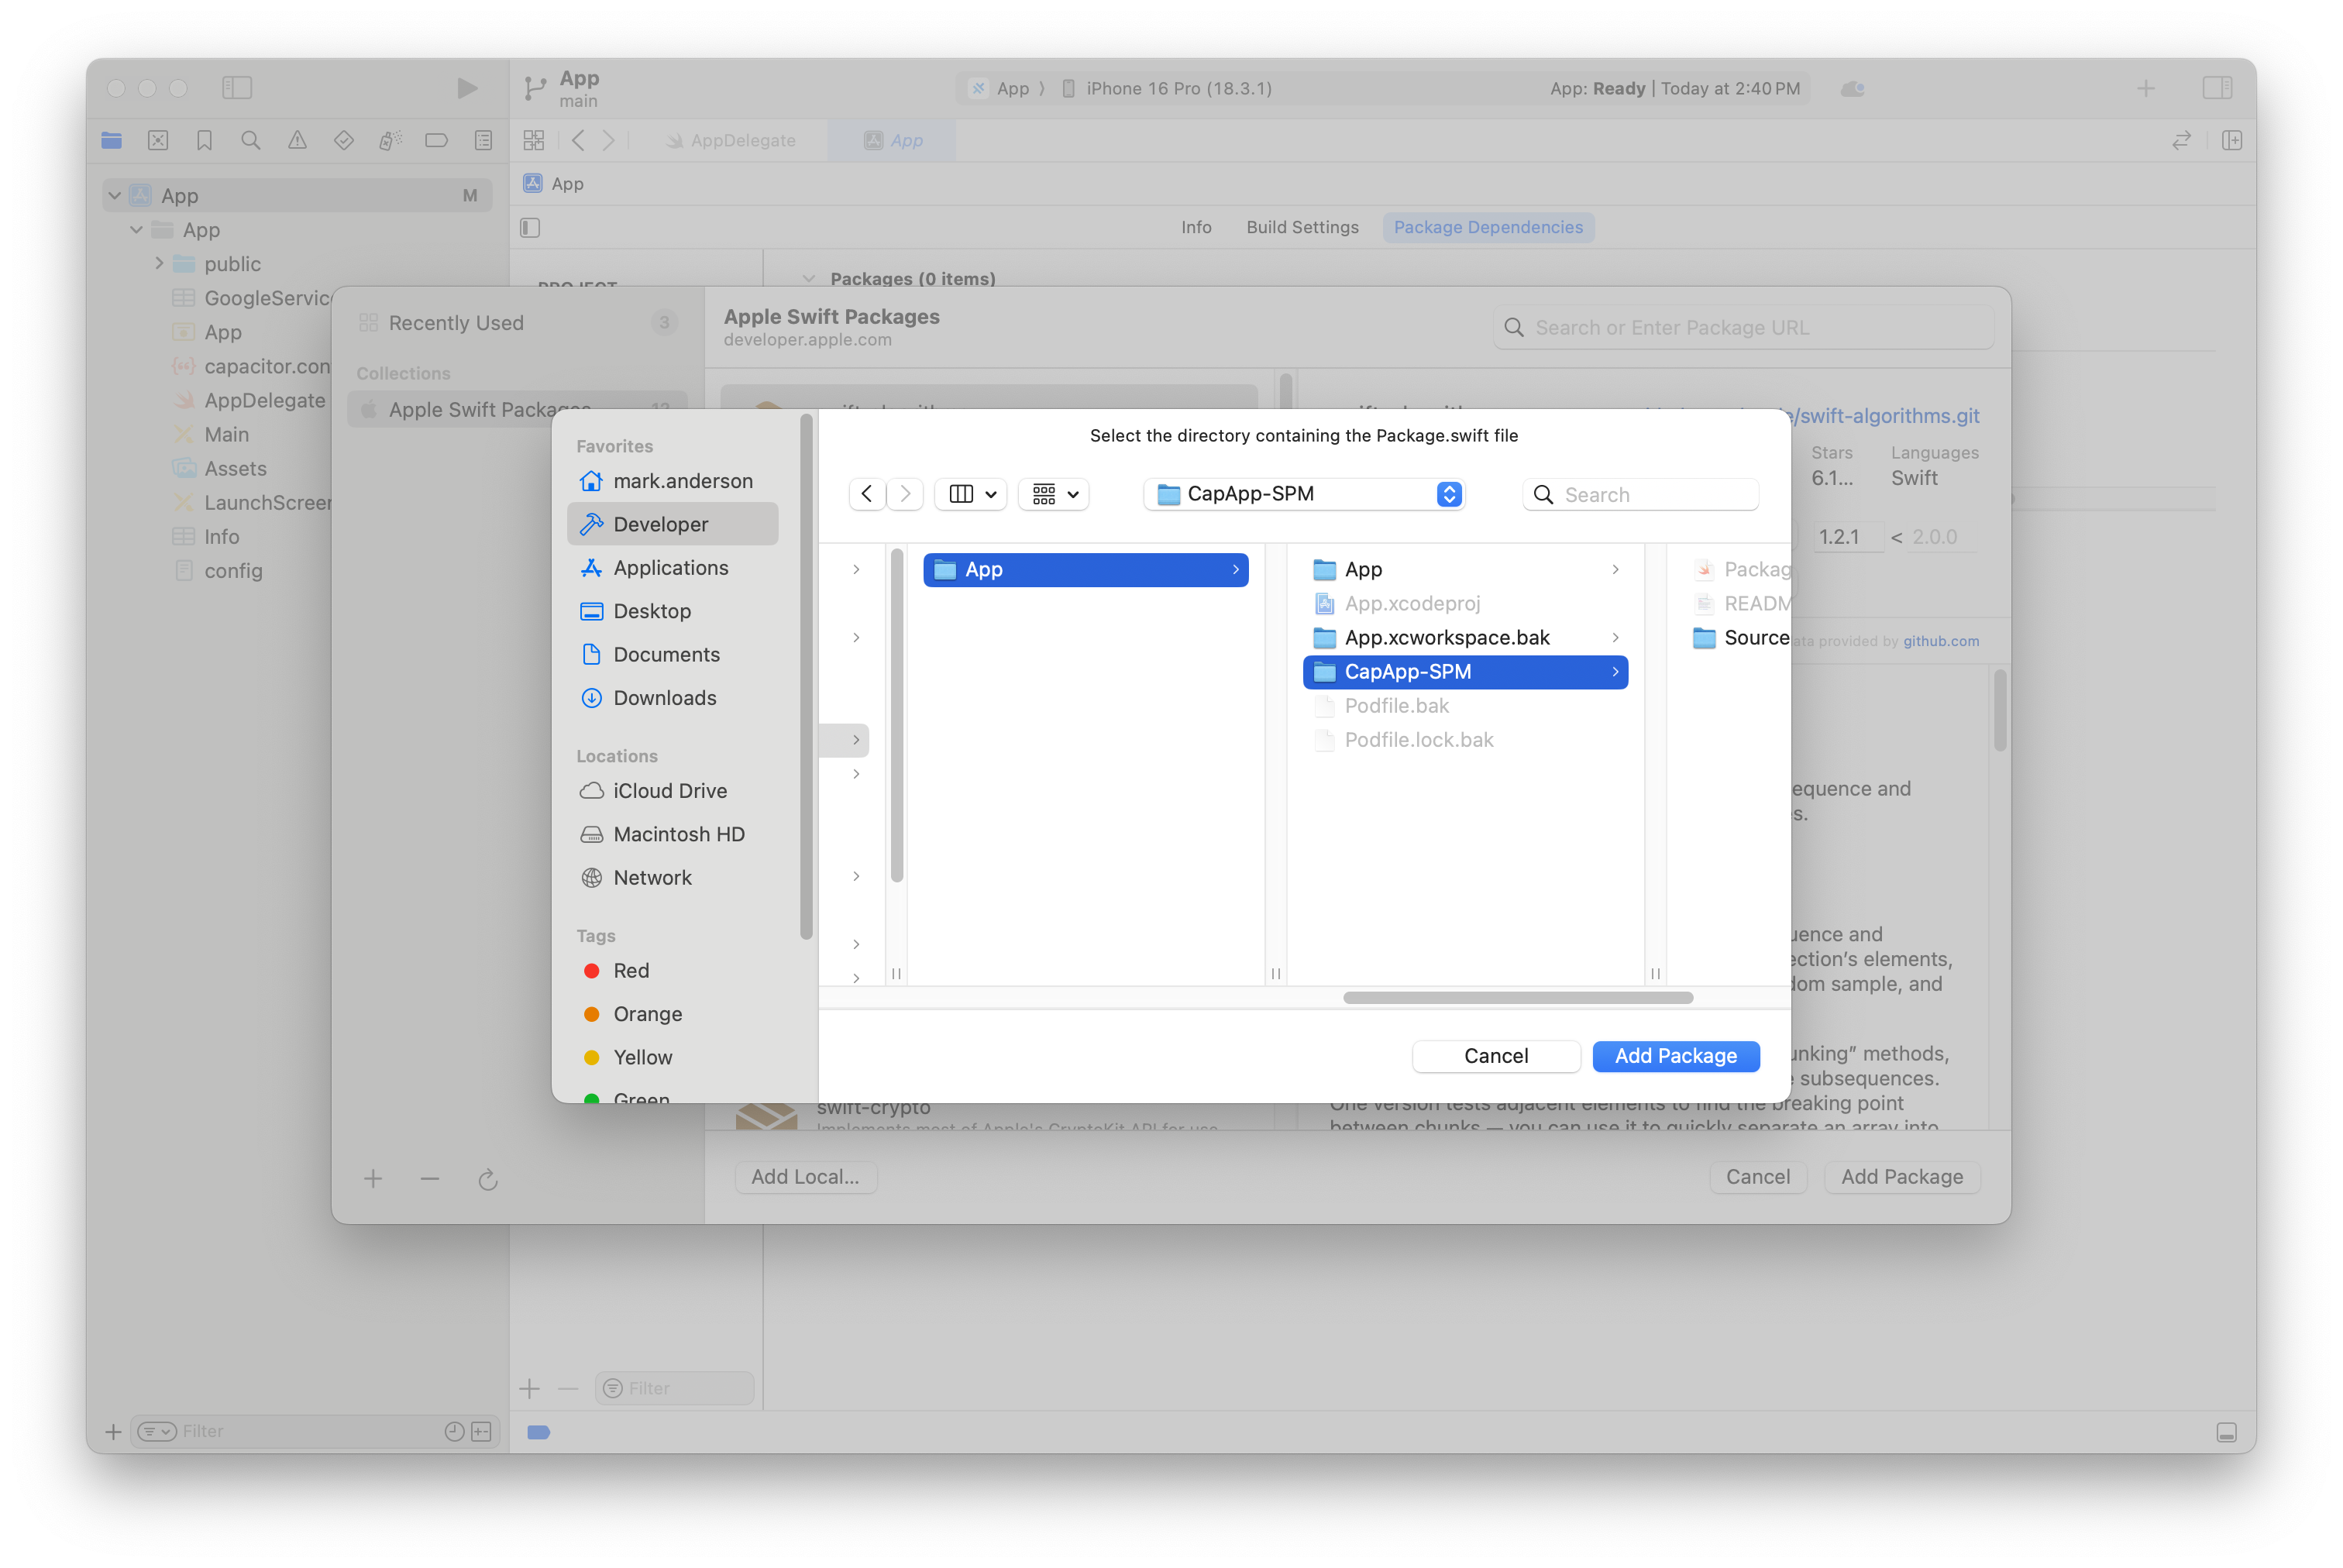
Click Add Package again when this screen shows up:
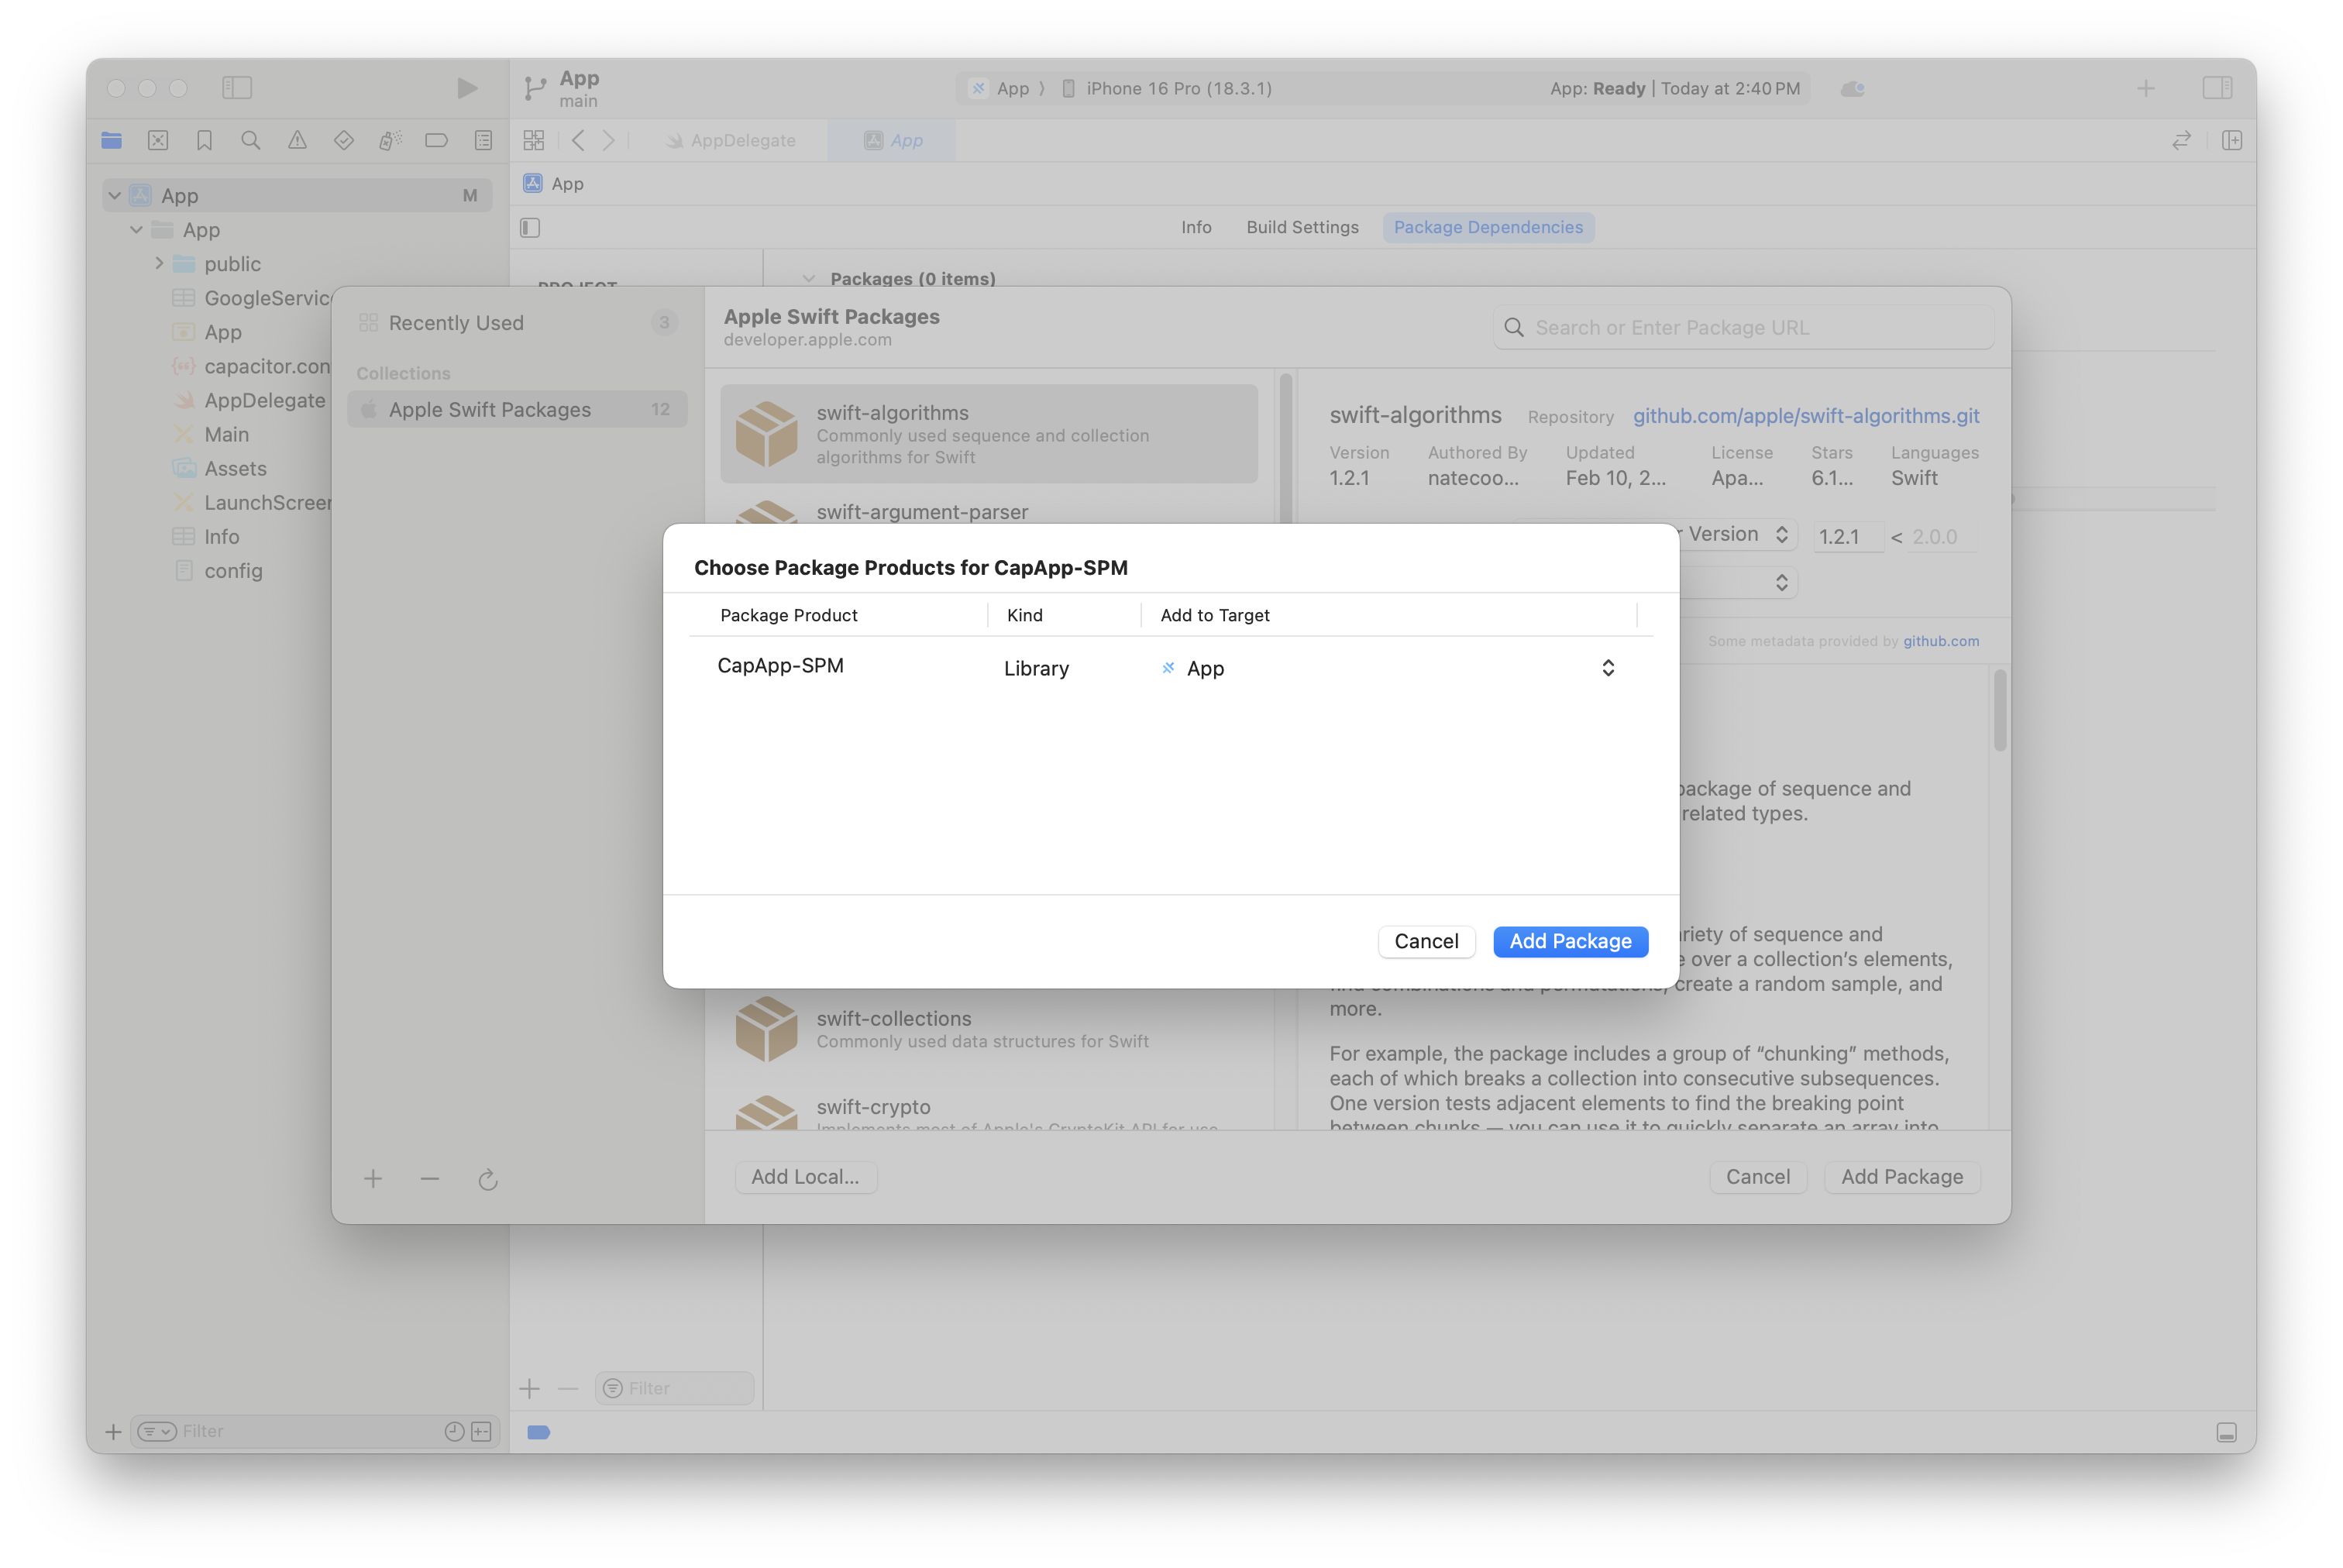
When you are done, you should see a screen like this. Now, move onto the next section about Adding debug.xconfig
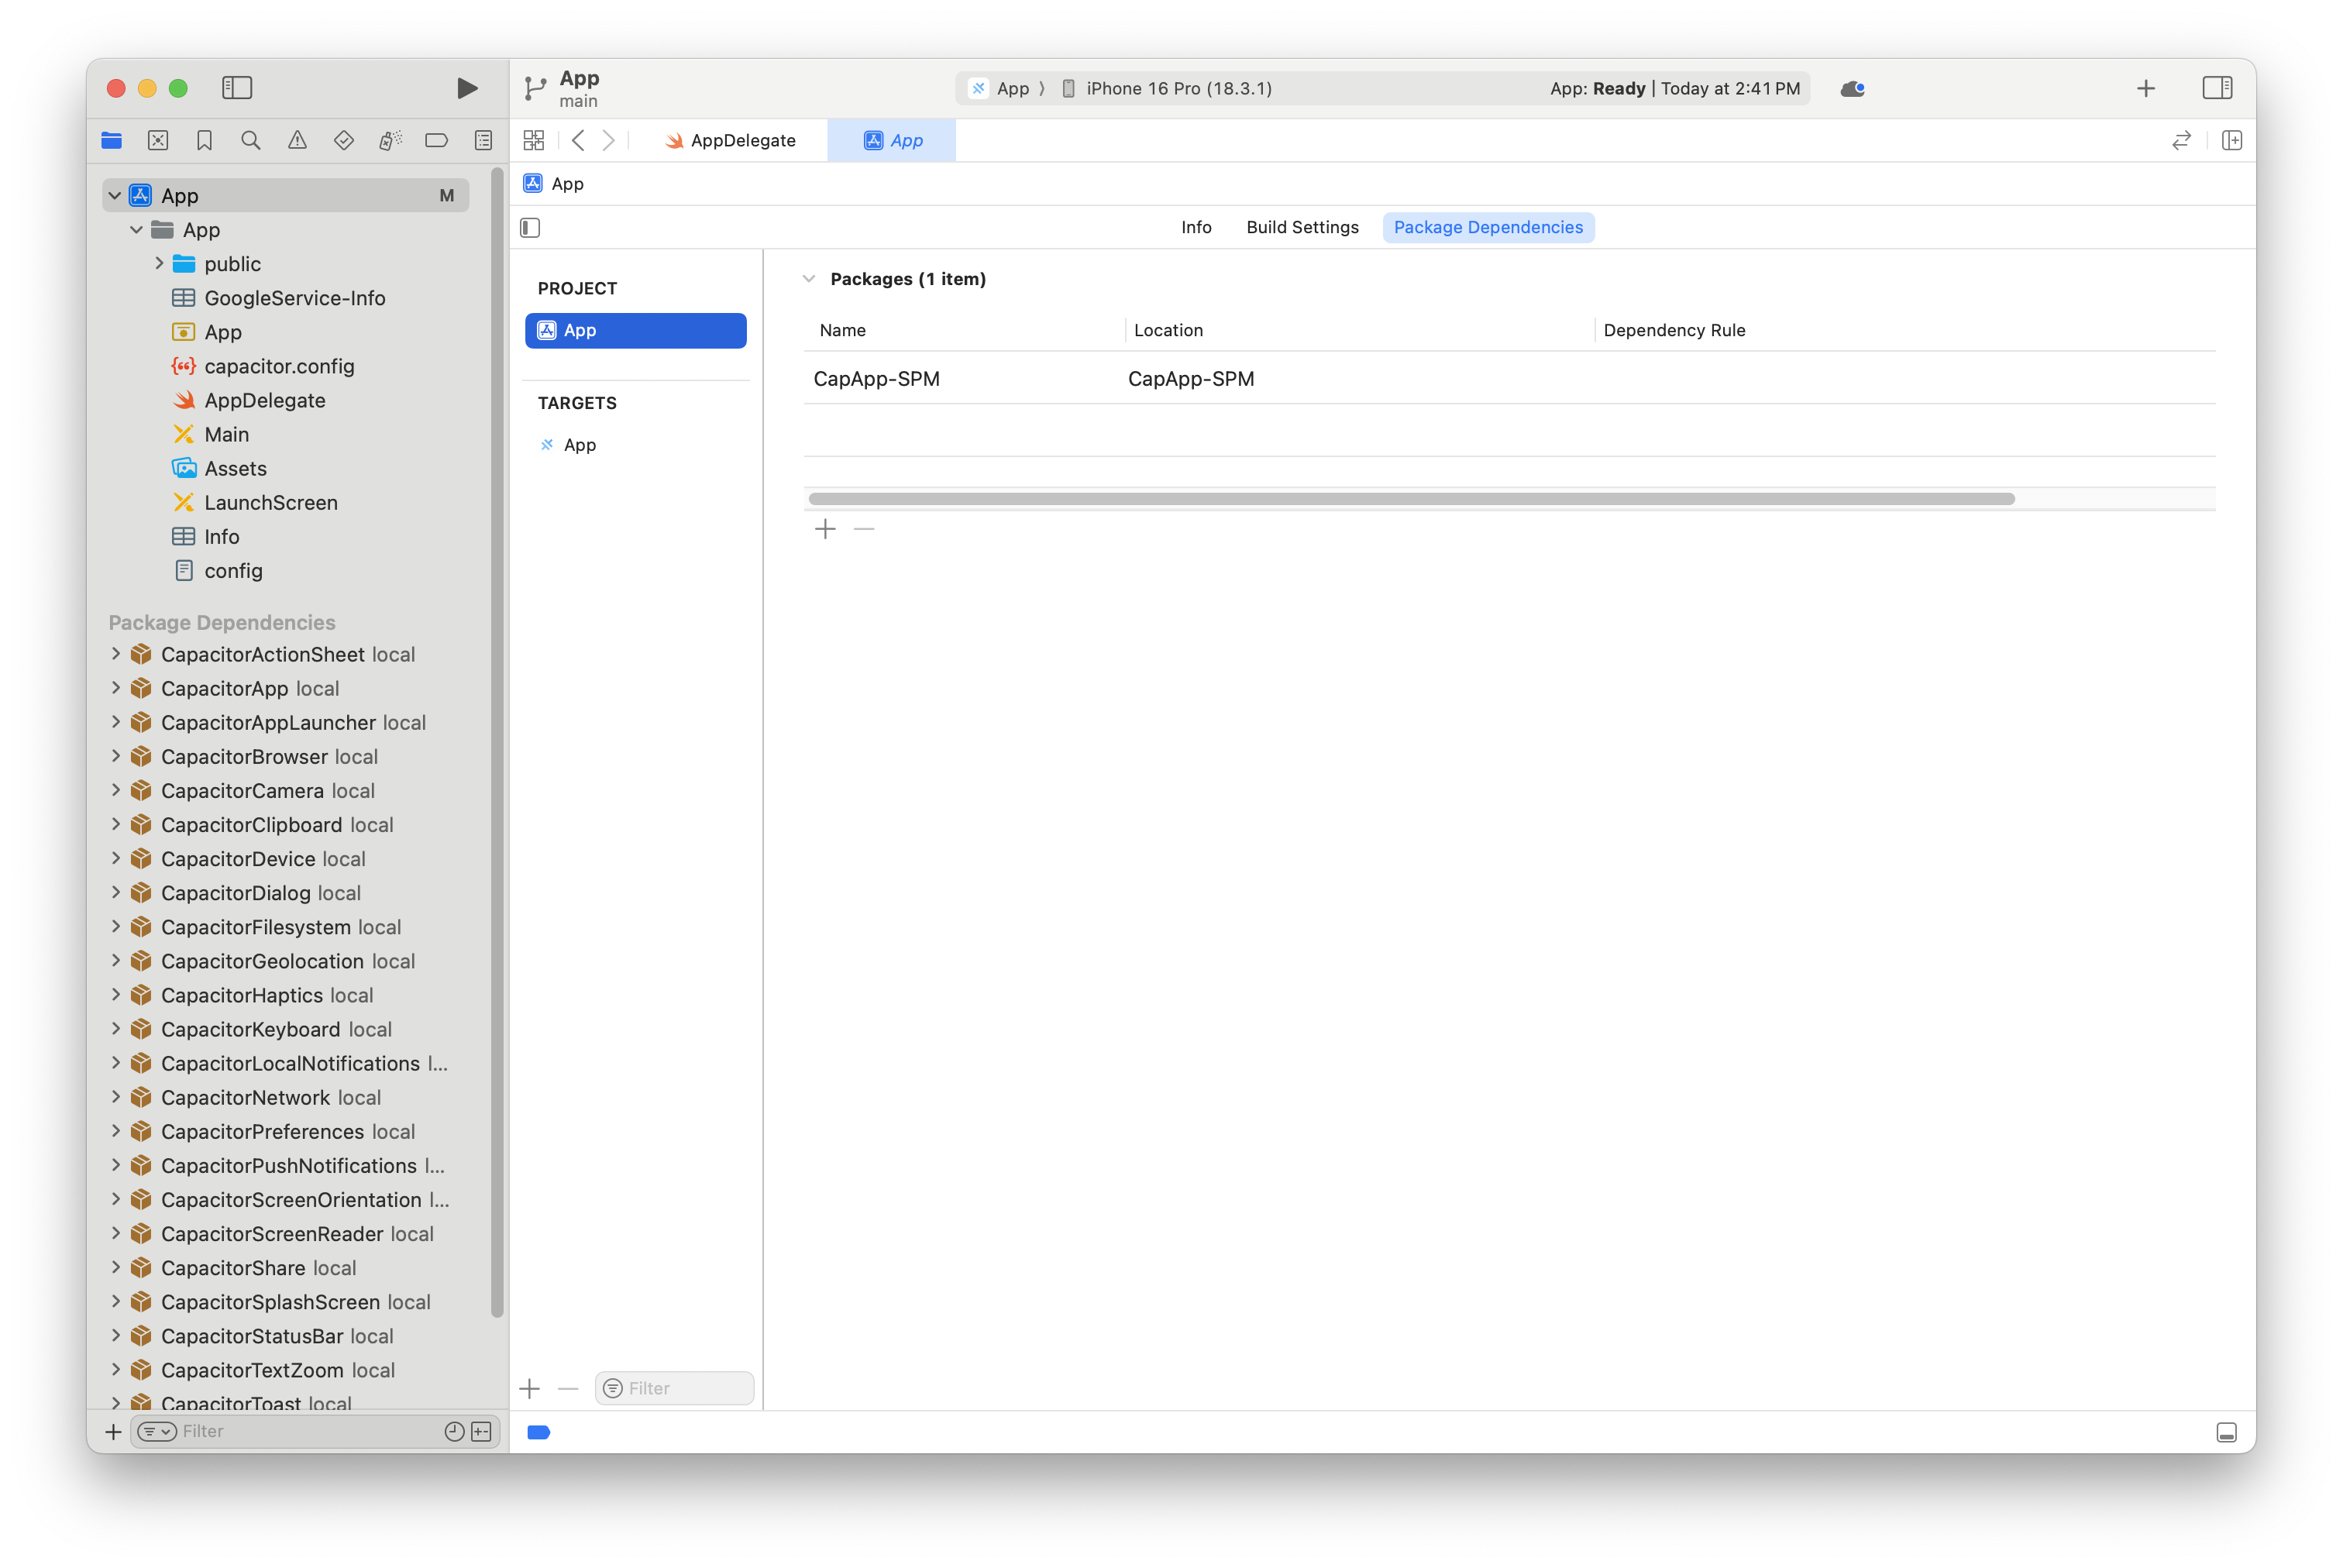
Adding debug.xcconfig to project
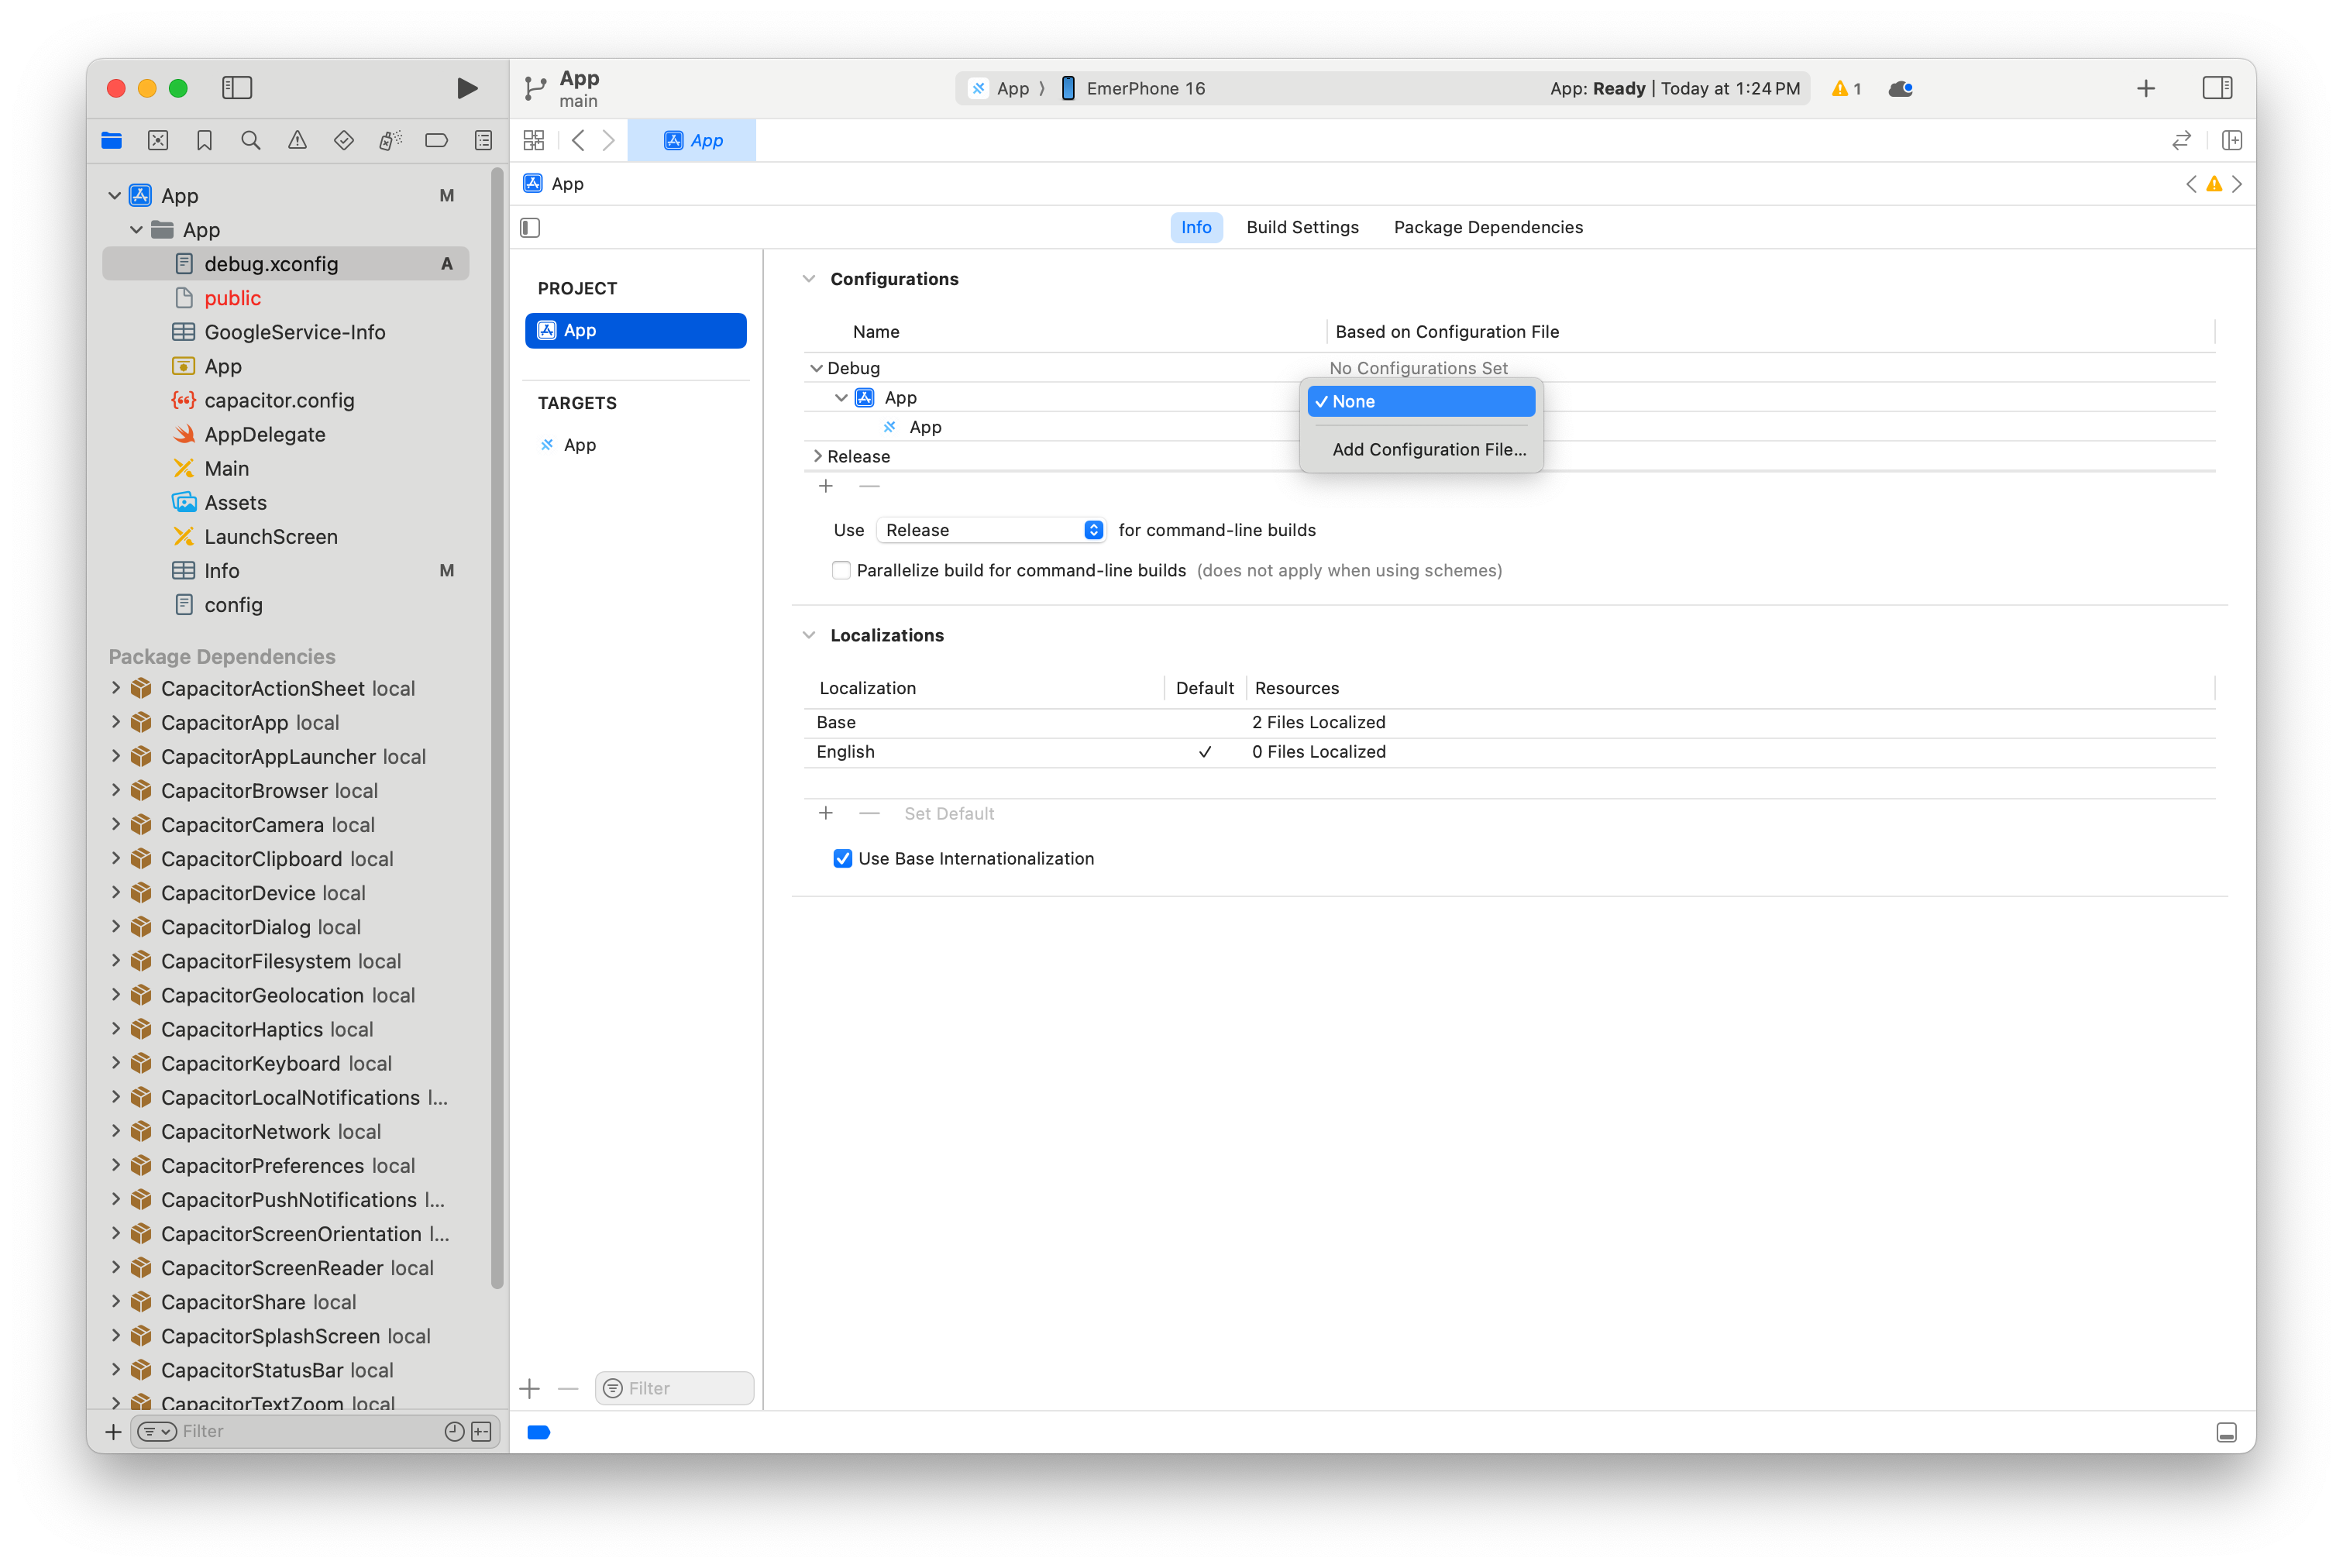
From the app info tab, select Add Configuration file...
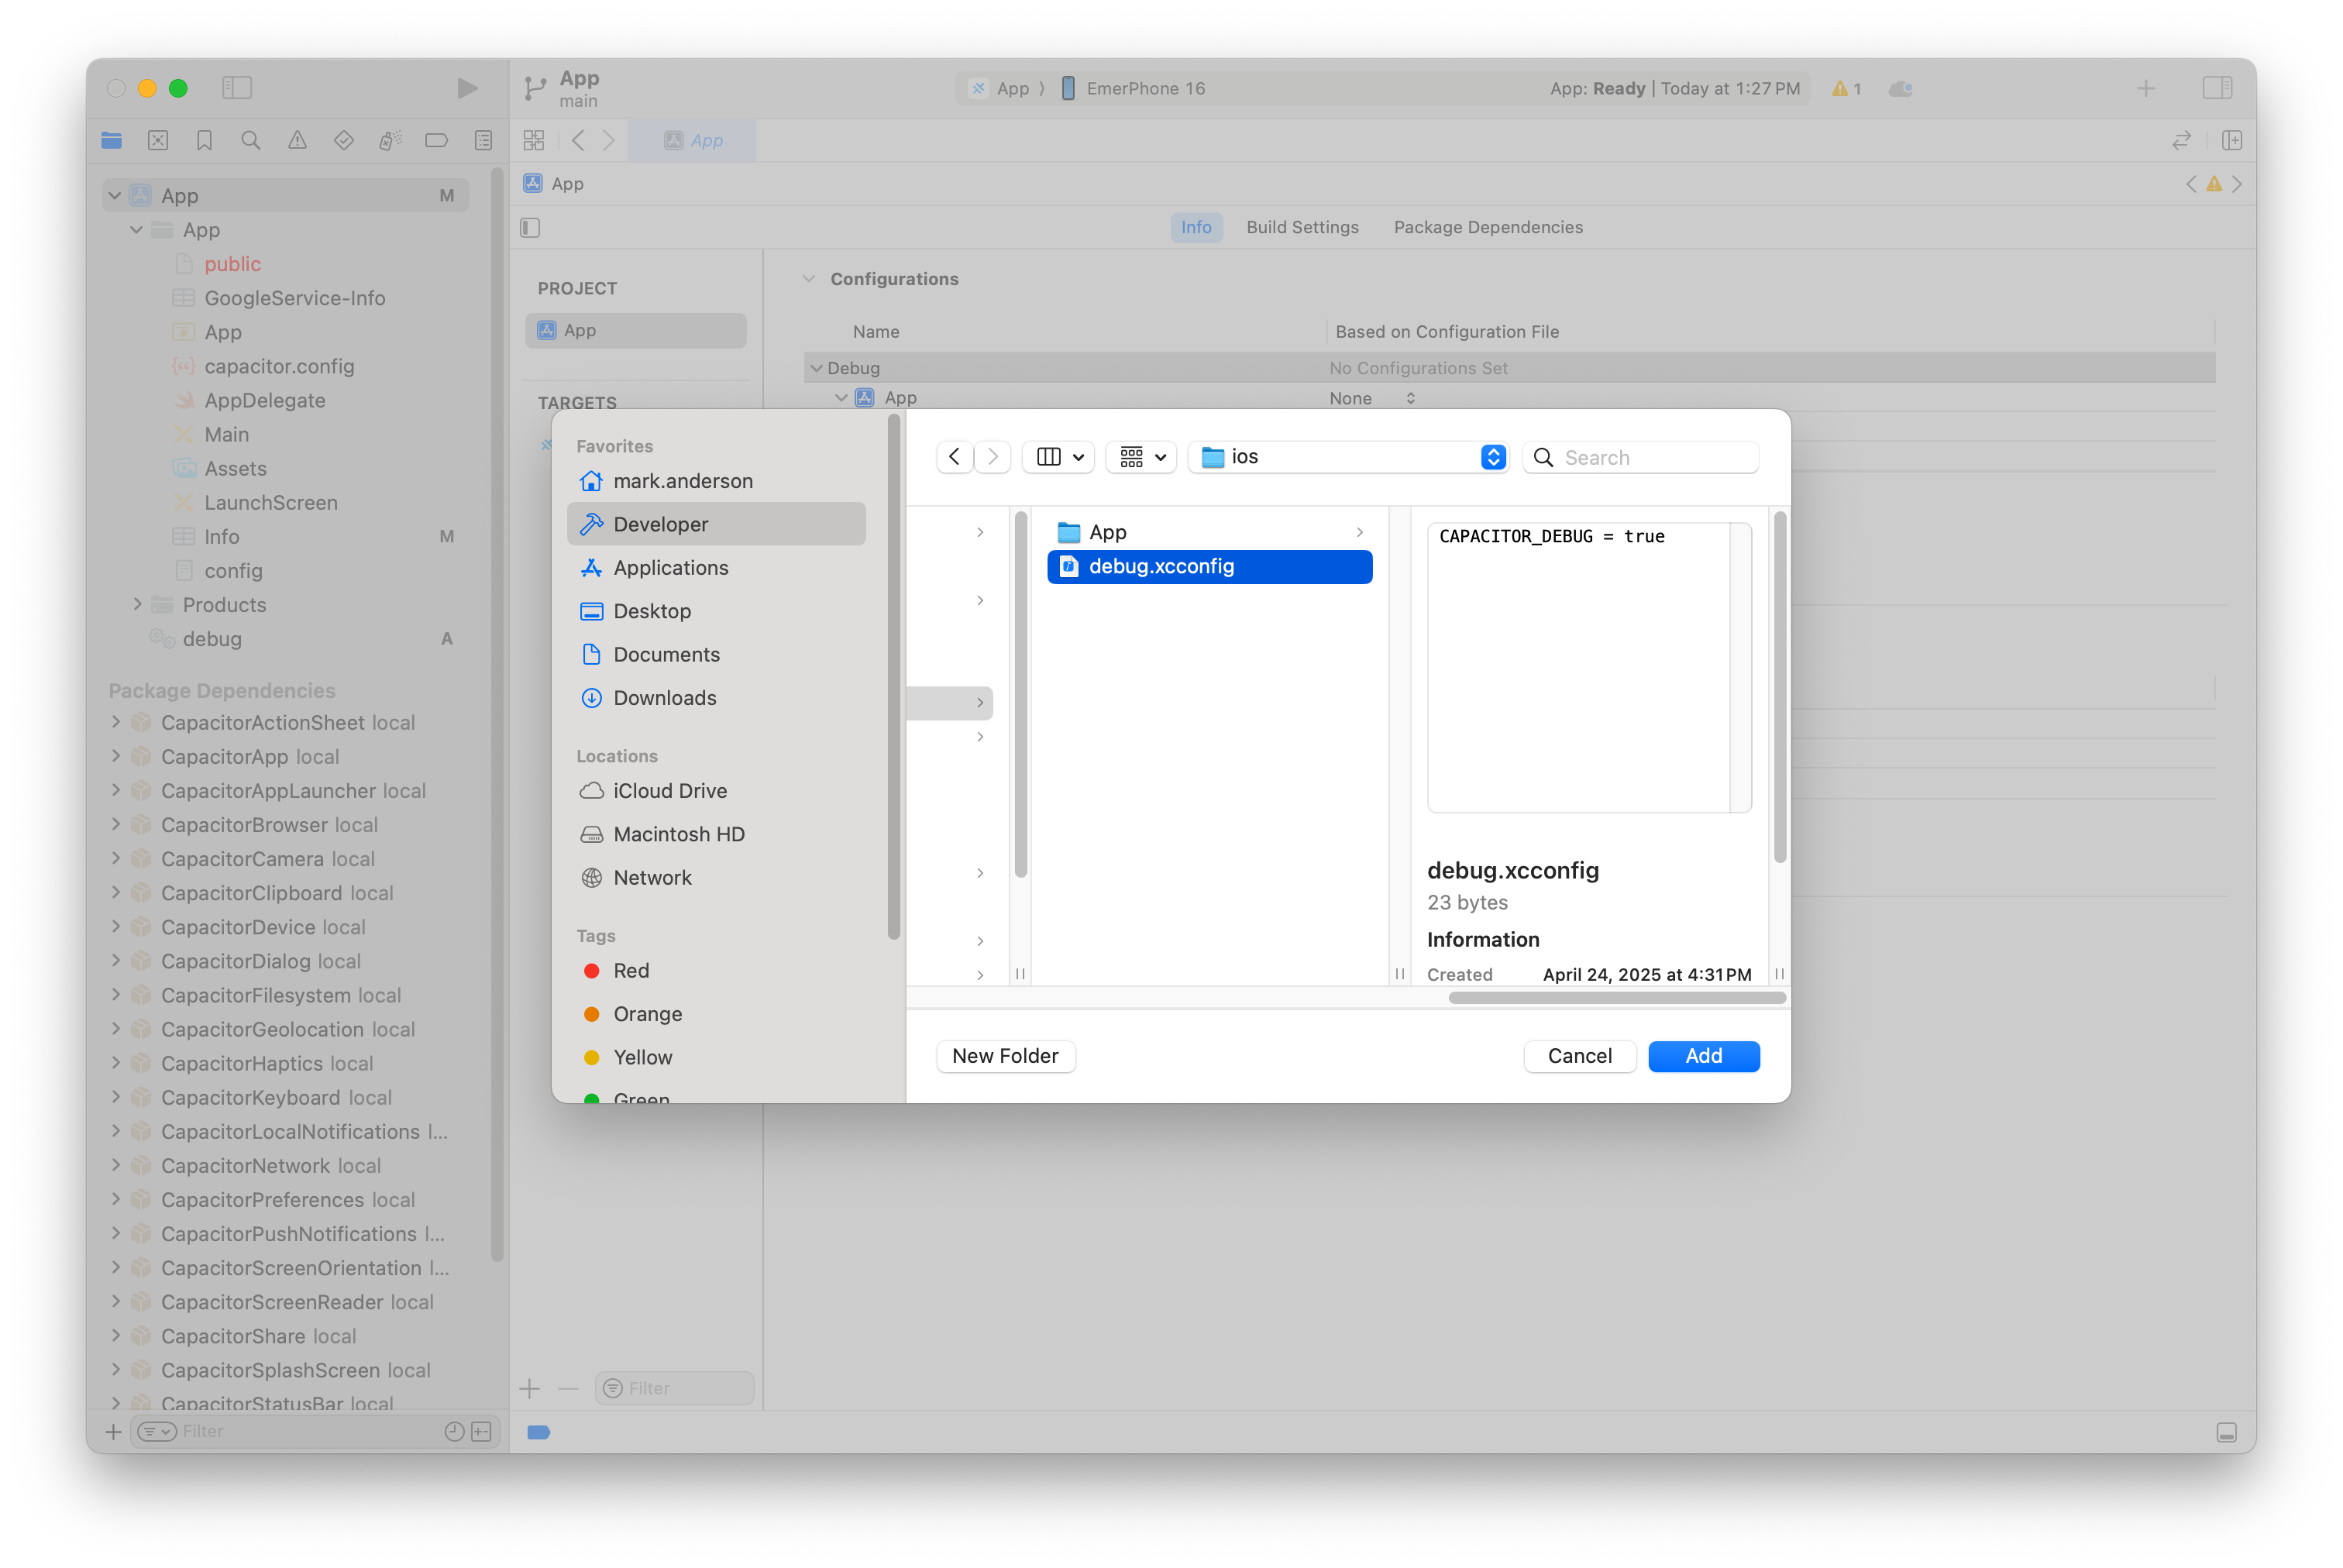
Then select the file called debug.xcconfig
Finally select xcconfig as your selection
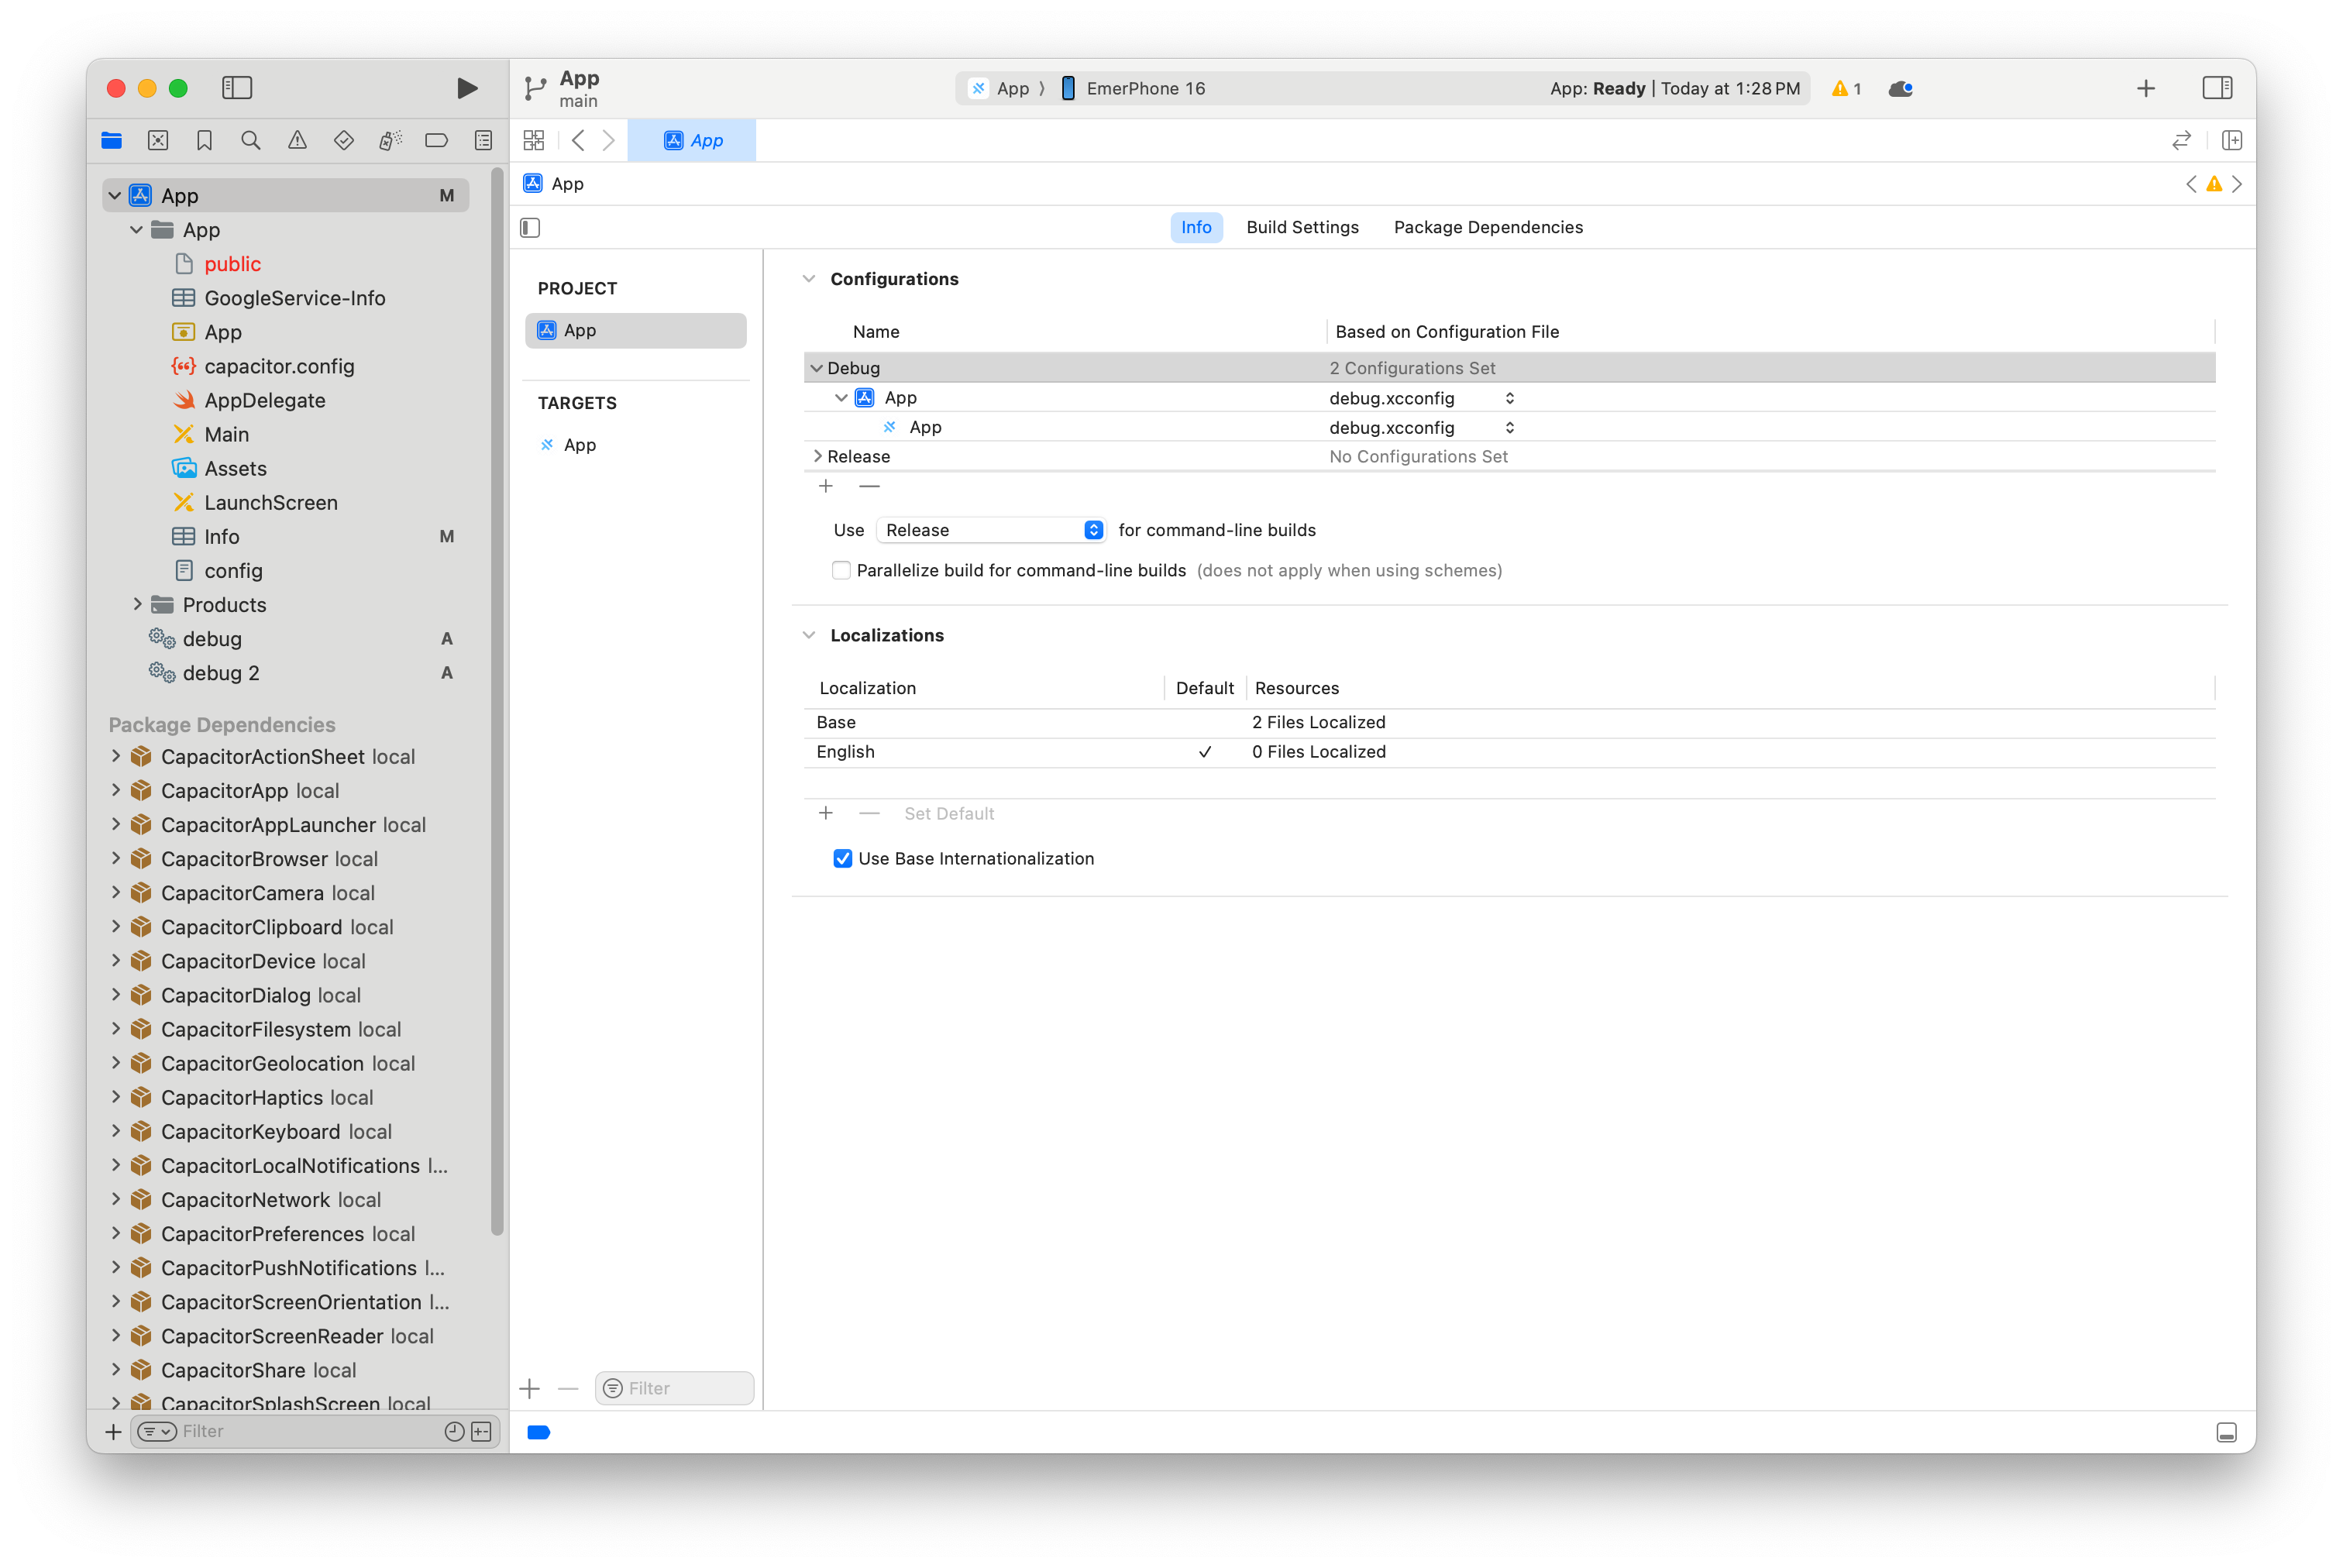
At this point you're done and can build and work as normal.
Converting existing plugins to SPM
If your plugin only contains Swift aside from the required [Name]Plugin.m and [Name]Plugin.h you can use the capacitor-plugin-converter.
This tool will do the following changes:
- Add the following required things to your main swift plugin file,
[Name]Plugin.swift:- Add Conformance to the
CAPBridgedPluginprotocol to your class. - Add 3 variables to your class.
identifier,jsName, andpluginMethods:identifierwill correspond to the first argument to theCAP_PLUGINmacro.jsNamewill correspond to the second argument to theCAP_PLUGINmacro.pluginMethodswill be an array of the methods passed to theCAP_PLUGINmacro.
- Add Conformance to the
- A
Package.swiftfile will be created at the root of your plugin folder. - The following files will be removed as they are no longer needed:
Plugin.xcodeprojPlugin.xcworkspacePlugin/Info.plistPluginTests/Info.plistPodfile
- To fit SPM best practices, the Project files will be moved to
SourcesandTestsdirectories. - The plugins
package.jsonwill get the following changes:- The files array will add these files or directories:
ios/Sourcesios/TestsPackage.swift
verify:ioswill be changed toxcodebuild -scheme YourPluginName -destination generic/platform=iOSto allow it to continue to work as you expect.
- The files array will add these files or directories:
- Your plugin podspec will be changed so that
s.source_filesnow points to theSourcesdirectory rather than thePlugindirectory.
See the documentation in the repository at capacitor-plugin-converter for more.
Troubleshooting
After adding plugins try to 'reset package caches' in Xcode: